This post may not be much to any veteran home brewer, but if you’re new to the hobby (life) of brewing you may enjoy this. It’s not anything you will have trouble finding on the internet either. I found a good video on Billy Brews and Denver references a short resourceful pdf from Athens’ local homebrew club. Those are probably better places to look on ‘how to’, but this is my first try at it and how I went about it. Will I do things differently next time? Absolutely. Do I feel there are things that I did to make it easier than others? Well of course.
One thing you might have figured out is that I have finally brewed this year. I didn’t get the yeast I wanted either, so I had to buy the German Hefeweizen WLP300 instead of the American version WLP320. It was two months past best by date too, so naturally, as I always do, I had to make a starter. Beer Smith suggested I make a 2L starter using two vials, but only one was available. Or I could have checked the other local home brew shop. I was starting to get a bit worried, but alas a few hours before I started brewing the starter was active on it’s own (without me swirling it). I am piecing together parts to make my own yeast stir plate. I’m pretty excited about that too.
So how and why does this work? Basically for each five gallon batch of home brew you buy an $8-$10 vial or smack pack of yeast. You make a starter using DME (dry malt extract) for the yeast to eat and multiply. Once the beer, now called wort before fermented, has reached its final gravity or close, you rack off to secondary or straight to bottling. The yeast has done its job and is tired and worn out. But hasn’t completely given up yet, just tired. Actually it’s eaten all the sugar it can. So after the wort is taken off the yeast you want to pour in boiled, sanitized water. This will remove the oxygen so the yeast doesn’t get excited and find something sweet to eat again. You want to pour the water on the yeast and swirl to free from your vessel and removed any clumps. Allow that to settle covered for 10 minutes or so, or just dump it all like I did. I only had quart mason jars available so I used them. Most recommend a gallon jar and I’ll do this next time. Not that it’s hard to pour into quart jars, but as you’ll see below, you have more ‘room’ to pull yeast from. Cap the jar or jars and throw in a fridge to speed the yeast settling. The water will stay a float, the heavies will drop and in the middle a nice milky yeast slurry. Here is what I prevail! I used a sanitized turkey baster to preciously pull the yeast from the middle of the jars. If it became to clear I’d lower it, or if I saw chunks I would apply pressure to the bulb and raise it back into the yeast area. After you’ve filled your jars to the lid, cap them and chill in the fridge. Being cool will keep the yeast cells hibernating. Make sure you mark your jars with the strain, date and use cycle. Mine are marked second generation since the first harvest was from the supplier. Post in the comments with any suggestions, questions or just want to blast me. I hope to use this strain again in about two more weeks. Most Hefeweizens are only 4-5% abv, so it doesn’t completely exhaust itself eating sugars anyways.
Cheers!

These are the six jars of yeast right after pouring.

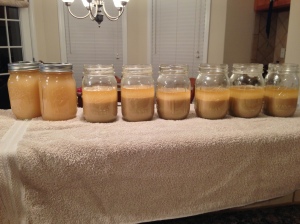
This is after 15 minutes of settling. I stared a lot between 1 and 15 minutes (not required).

This is 45 minutes after pouring and 15 minutes in the fridge. I stared even more between 30 and 45 minutes (not required).

The jar on the right is how much yeast I pulled from the first of six jars.

I filled this jar on the left from the four jars on the right, but there is yeast left in those jars.
- Here’s the six jars I will dump and the two jars of washed yeast I will chill.


Here’s the yeast at the bottom that I will use next home brew day. Costing me about 2.5 hours of time and saving me $8. But doing what you enjoy comes at no cost (free labor).

Leave a comment
Comments 0